Tag Archives: guide

Easy Sump Pump Installation: How to Do It Yourself

Easy Sump Pump Installation: How to Do It Yourself
You don’t need to be a plumber to set up your own sump pump. Here’s what you need to know.

While most homeowners will call a professional  plumber to handle a sump pump installation, the truth is that you can typically get the job done on your own if you have the knowledge, the tools, and the time to do it yourself. Today we’ll look at what sump pumps are, why you want one, how to dig sump pits, and how to install the pumps themselves. We’ll also cover how to choose AC, DC, AC/DC, and water-based sump pumps simple enough to install on your own and reliable enough to work for years.

What’s a sump pump and why would you want one?

Easy Sump Pump Installation: How to Do It Yourself
While all sump pumps are a bit different, many will resemble the Zoeller M267, our favorite AC pump.

A sump pump is a essentially a water pump to carry water from one area (e.g., an excavated hole in your basement) to another (out of your home via a discharge pipe). People typically install them to keep basements dry (particularly finished or carpeted basements), since basements naturally accumulate water due to osmosis, groundwater, and soil saturation from rainfall and flooding.

Sump pumps are typically found in sump pits or basins, which themselves are usually installed beneath basement or at low points where water naturally accumulates. You can buy sump pumps in stores or online. They’re typically made of cast iron, aluminum, or plastic. They spend most of their time in dormant states, but activate when water sufficiently fills the sump pits in which they are immersed. They pump water out of the pit and out of your home and shut off automatically once water levels drop to pre-activation levels.

If you’re dealing with water problems in your basement, a sump pump is an effective, inexpensive, and easily installed tool to keep water at bay. But if you frequently deal with basement flooding, you’ll want to look into additional irrigation techniques beyond a sump pump installation.

What kinds of sump pumps are typically installed in a home?

Easy Sump Pump Installation: How to Do It Yourself
Always have a backup sump pump to support your main pump. We recommend a combination pump like the Wayne WSSM40V.

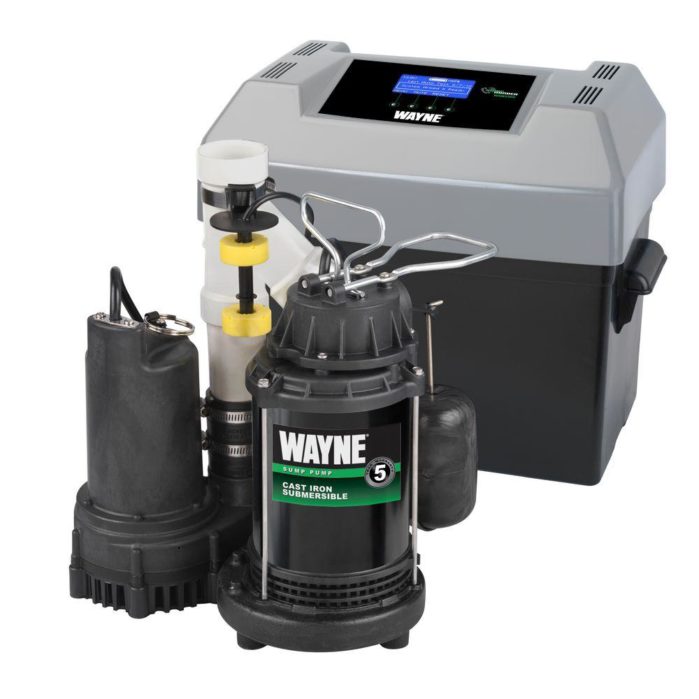
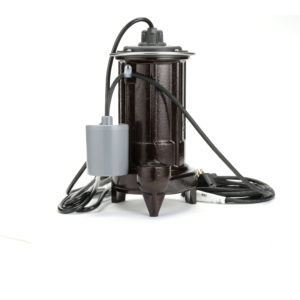
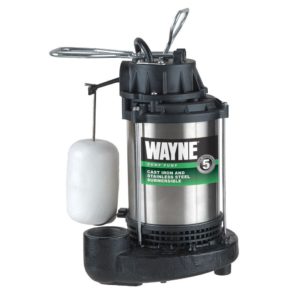
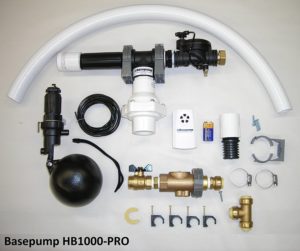
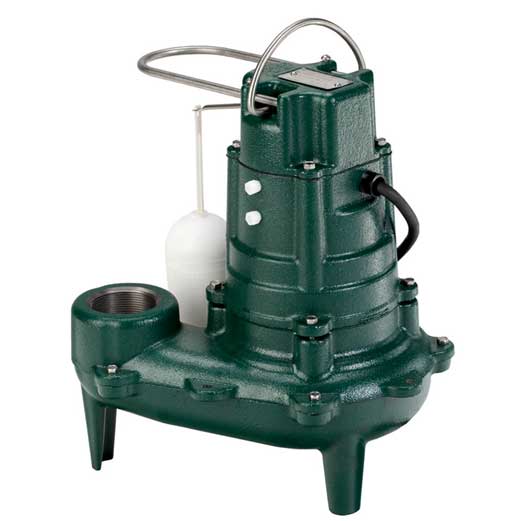
While there are lots of models on the market, nearly all sump pumps can be divided into one of four categories: AC-based sump pumps (e.g., a Zoeller M267), DC backup pumps (e.g., a Wayne WSM3300), AC/DC combination pumps (e.g., a Wayne WSSM40V), and water-based pumps (e.g., a Basepump HB1000-PRO). Most homes will use AC pumps exclusively, but we always recommend installing a backup pump that’s either DC-powered (via a deep cycle battery) or by water (which requires no electrical power in the home).

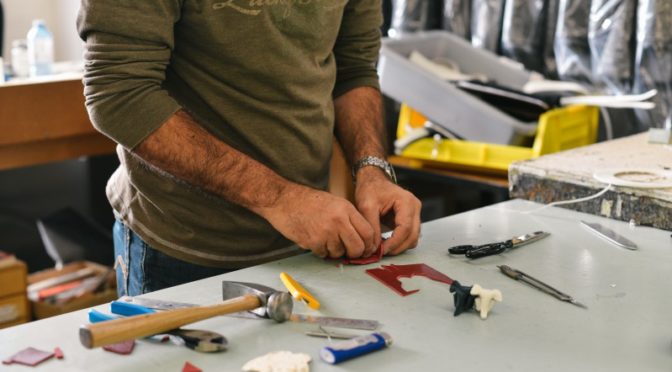
While most homeowners will call plumbers to install sump pumps, with enough motivation, a DIY-minded man or woman can also get the job done. If you’re set on installing your sump pump independently, you’ll want to budget at least $300 to $600 for materials (e.g., the pump, pipes, connectors, tools) as well as a weekend to get the job done from start to finish.

How do you dig and set up a sump pit or basin?

Easy Sump Pump Installation: How to Do It Yourself
If you’re going to use a jackhammer more than once, the XtremepowerUS-2200watt is a cheap and reliable electric model.

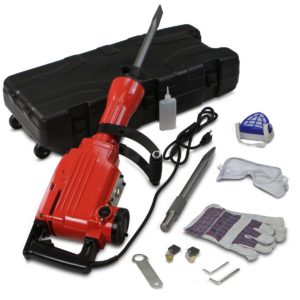
The first step is to set up the sump basin in your basement. Once you’ve bought a sump basin, you’ll need to buy, rent or borrow a jackhammer to open up the concrete flooring so you can dig the pit. If you already have a sump basin, of course, you can skip this step. Otherwise, rent an electric jackhammer from a hardware store, make sure it has a flat spade bit, don your eye, ear, and hand protection, and get to work. If you want a cheap electric jackhammer to keep around the house for multiple projects, we recommend the Xtremepower US 2200 watt.

Before digging, though, you’ll want to draw a circle around your sump basin to mark where you’re going to dig. Your basin should be upside down because it’s going to be wider at the entry, and you’ll need a hole big enough for it to fit easily. Also make sure your circle is at least 4, but no more than 6, inches around your basin. Keep at least a foot away from your basement walls so you don’t hit your foundation footing. With the jackhammer, follow the circle you’ve drawn to break through your concrete floor.

Once you’ve cleared the concrete, you’ll want to dig a hole deep enough to fit your sump basin completely inside; measure the basin beforehand to get the correct height, or simply try it in the hole as you dig. There will be gaps around the basin when it’s in the hole; use gravel to fill those in. You’ll want to level the gravel with a full inch of height above your basement level and then use concrete to fill the remaining gap. Use a trowel to smooth the concrete and let it set for a minimum of 24 hours.

How do you install the sump pump itself?

To install the pump, you’ll naturally want to follow the directions in the manual above all. However, if it’s an electric pump, you’ll generally place it in the basin once the concrete is set. If you’re setting up a water-based pump, it’ll need to tie into your water main to receive the water that powers it. Set up the check valve, inlet pipe, and discharge pipe if it isn’t already in place, and drill a hole in your rim joist so you can run the pipe out of your home.

Continue running the pipe until it’s positioned so water drains downstream of your foundation. Avoid discharging into a septic or sewer system without double-checking to ensure that you’re allowed to do so in your local building code. If you can’t get a good grade away from your home, it might be necessary to install a drywell and empty your discharge pipe into it.

Once the hole is set, seal it with caulk. Plug your pump in using a ground fault circuit interrupter, or GFCI outlet. Test the pump by using a garden hose or bucket to fill the pit with water. Follow a maintenance schedule to test your pump periodically to make sure it works when you need it to.

Which AC, DC, and water-backup sump pumps are easiest to install?

Easy Sump Pump Installation: How to Do It Yourself
The Basepump HB1000-PRO is a good example of a reliable and easy-setup water-based sump pump.

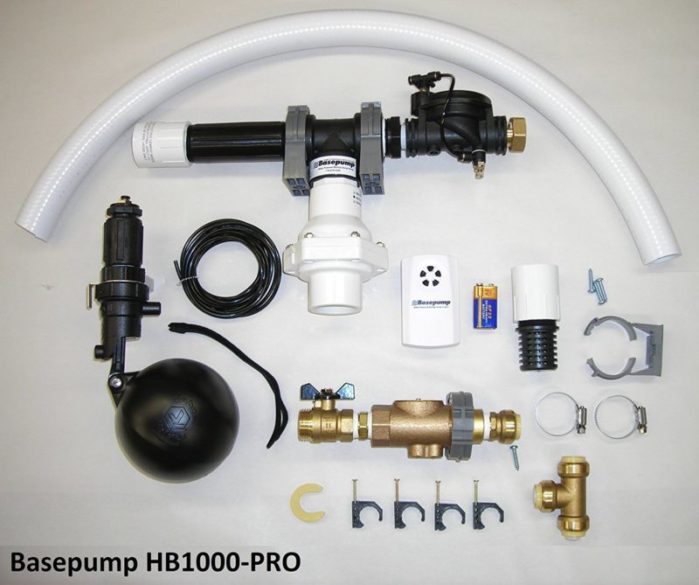
If you’re going to install a sump pump, you might as well make it easy on yourself . The following suggestions are reliable, easy to set up, and will also result in less time on the job for the plumber you call if things go wrong. For an AC pump, we’d recommend buying the Zoeller M267, which we’ve reviewed here and would trust to keep any basement dry. If you want a DC-only backup, choose the Wayne WSM3300, which we’ve reviewed here; it’s practically a drop-in installation. For an AC/DC combo, the Wayne WSSM40V, which we’ve reviewed here. And for the ultimate reliability, skip electricity entirely for a water-based sump pump like the Basepump HB1000-PRO, which we’ve reviewed here.

If you find our work at PumpThatSump helpful, you can put our relentless reviewing of every pump and fixture on the market to the test by shopping via our links above for whatever you need to make your house a home. Despite being self-employed, we promise not to spend it all on health insurance.

Simple Sump Pump Repairs and Maintenance for Beginners

Simple Sump Pump Repairs and Maintenance for Beginners
You don’t need a plumber to review 90% of what can go wrong with a sump pump. Here’s what you need to know to keep yours running.

If you’ve already bought and installed a sump pump (both a primary and a backup), you’re ahead of the game when it comes to flood prevention. Even if you don’t have a backup, simply maintaining your primary sump pump can go a long way toward ensuring it’s ready to keep your basement dry when the rains start pouring and the water starts rising.

However, many homeowners, business owners, and landlords shy away from sump pump repairs and maintenance out of a lack of knowledge and fear of making things worse. Fortunately, you don’t have to join a trade union to learn some basic plumbing. Today we’ll cover some of the more common areas to look over and how to fix them if something goes awry in your sump pump setup.

Make sure the float is in good working order

Simple Sump Pump Repairs and Maintenance for Beginners
The Zoeller M267 is our favorite AC-powered sump pump due to its buy-it-for-life reliability.

One of the most important parts of any sump pump is its float. Unfortunately, it’s also one of the parts most prone to failure. A float is, as its name suggests, a piece of your pump that floats, or rises, in your sump pit whenever water levels rise. When it reaches a certain level, your sump pump motor activates and begins to pump water out of the sump basin and out of your home via a discharge pipe.

Conversely, when enough water has been pumped out or when the water level has naturally dropped, so does the float, and the pump is triggered to turn off. It’s the same technology that starts and stops a toilet tank from filling with water. If it doesn’t work, however, your pump won’t start pumping when it needs to, and you’ll have a flooded basement on your hands. This is why testing it on a regular basis (we suggest every three months or so) is a good idea.

You can check it easily by running a garden hose into your sump pit or by slowly pouring water inside it via  a bucket. You should see your float rise with water levels, resulting in the activation of your pump, the removal of water, the lowering of the float, and the turning off of your pump. A pump that doesn’t shut off due to a stuck or malfunctioning float is almost as bad as a pump that doesn’t start for the same reason: the pump will eventually burn out, leaving you with nothing to defend your basement unless you have a backup sump pump.

It’s worth noting that a water-based sump pump doesn’t use a float switch, meaning you can ignore the information above and rest easy if you have one. However, if you use both an electricity- and water-based pump in the same pit, you’ll still need to check the float for the electric pump.

Clean out your sump basin (the sump pit)

Just as you wouldn’t throw garbage in your sink and wonder why your drains stopped working, your sump pit needs to be clean if you want your sump pump to do its job. To put it simply, you need to keep your sump pit as free of debris as possible to keep your float free to rise and fall with water levels.

Even the best AC pump on the market (e.g., the Zoeller M267) won’t be able to keep up with water levels if the float gets stuck. Keep your pit clear and check it every few months to make sure it stays that way. You don’t need any special tools besides some gloves, a plastic bag, and a willingness to get a little dirty; the most you’re likely to find there is dirt, mud, gravel, stones, and leaves.

Make sure the check valve isn’t faulty

Simple Sump Pump Repairs and Maintenance for Beginners
Even a high-quality sump pump like the Liberty Pumps 287 will fail to work if the check valve breaks.

The check valve serves the same function as the little flap in our throats that closes when we drink so water doesn’t enter our lungs; it makes sure fluids go one way and not the other. In this case, it keeps water moving up and out of the pit via the discharge pipe. If it fails, your pump will run whenever the float switch tells it to, but it’s never going to remove water from your sump pit, because it’s just going to rush back down the gravity tube and re-enter the pit through your intake pipe.

You can test this by the garden hose and bucket methods above. If your pump is running but water isn’t leaving, it’s probably the check valve that’s giving you trouble, and it will need replacement.

If there’s an impeller, clean it

Simple Sump Pump Repairs and Maintenance for Beginners
Every motor-driven sump pump, including the Wayne CDU1000, includes an impeller that can be clogged.

If you’re dealing with an electricity-powered sump pump, it’s going to have an impeller to pump water from the intake pipe to the discharge pipe and out of your home. The impeller will be located inside the pump and typically behind some kind of screen that helps keep debris out–the debris you’re ideally cleaning frequently from your sump pit. However, if enough debris gets past or through the screen, your impeller can jam. If it jams, your pump won’t pump a thing until the impeller is unjammed.

To check if this is an issue, do the garden hose or bucket test. if your pump isn’t running and is connected to a working power source, you’ll want to unplug it, detach the intake and discharge pipes, and pull the pump from your sump basin. You’ll need to open up the pump to get past the screen and clear debris from the impeller, and then close everything back up and reconnect the pump. This is a procedure many homeowners won’t be comfortable with, so you might want to call for help from a plumber here if you don’t want to tackle it on your own. However, if you can do so on your own, you can save a lot of money and fix what’s essentially a very simple problem.

Once again, this is a problem unique to electricity-powered pumps. If you’re using a water-based pump, none of this applies to you.

Verify your electrical connections

Finally, if you’re using a motor-driven pump, you’ll want to make sure everything is plugged in if the pump doesn’t seem to be working. That means checking the pump-to-cord connection, the plug at the outlet, and your circuit breaker. If you have a ground fault circuit interrupter, or GCFI, make sure that hasn’t been tripped, as sump pumps are notorious for activating them. You’ll be back on your way once you press the reset button. However, if your electrical supply is connected and in good working condition (use a plug-in phone charger or similar small device to test your outlets), the pump itself is likely in need of repair.

Invest in a reliable AC, backup, or water-powered sump pump

Simple Sump Pump Repairs and Maintenance for Beginners
To rid yourself of electricity, motor, and float vulnerabilities, consider a water-based pump like the Basepump HB1000-PRO.

By now, we’ve hopefully established that having a quality sump pump is the first part of the maintenance chain; just as with cars, every vehicle looks nice when it rolls off the lot, but the engineering at the factory will determine whether you’re desperate to sell it at 100,000 miles or if you’re simply getting ready for another 100,000 on the odometer. It’s worth starting out with a machine that costs a bit more but lasts a lot longer than trying to save a bit now only to pay a lot more later.

If you’re going to buy an AC pump, make it a Zoeller M267, which we’ve reviewed here and sung the praises of for years. If you want a DC backup, get the Wayne WSM3300, which we’ve reviewed here, and rest easy. For a combination AC/DC pump, buy the Wayne WSSM40V, which we’ve reviewed here and continue to be impressed by. And if you’re tired of depending on electricity, forget everything above and invest in a water-based sump pump like the Basepump HB1000-PRO, which we’ve reviewed here, and would trust to keep any home of ours dry.

If you find our work at PumpThatSump helpful, you can put our relentless reviewing of every pump and fixture on the market to the test by shopping via our links above for whatever you need to make your house a home. Despite being self-employed, we promise not to spend it all on health insurance.